
Hey everyone, I’m back with another blog post! Continuing the momentum of the “Rust To Roar” series, in this post I will be unfolding Phase 2 of my Hero Impulse bike restoration project.
If you haven’t read the first phase of this bike restoration project, make sure you read it here!
(7 minute read)
Picking up from where the last bolt tightened, in the first quarter of 2025, I put the bike through its paces across the rain-soaked trails of Divar Island. However, as mid-September rolled around and law school got intense, I stopped using the bike (and my Dad too). Just like that, the bike was back to square one; it refused to start, and sat in a stubborn silence from September 2025 to January 2026.
Phase 2
Disclaimer: Unlike Phase 1, Phase 2 of this project has not been completed as a daily challenge since I had to work around my work and college hours. This phase is spread over 2 months.
29th January 2026
After weeks of badgering my Dad to take the bike to a professional mechanic, I returned home from college on January 29th 2026, overjoyed to find that the Hero Impulse was no-where to be found in my garage.
Despite the bike not being used, the chassis was not rusted and the bike was in the same condition as I had left it. Therefore the role of the mechanic, was mainly to focus on the carburettor, engine and battery issues to ensure it could be cranked up again.
5th February, 2026
After what felt like a month of waiting, on 5th February, I picked up the bike from the mechanic and rode it back home. The bike had gone through a plethora of major and minor fixes.
Major Highlights of the Mechanic’s Work
- New Battery
- Engine Oil
- Front Fork Work
- Air Filter
Detailed Breakdown of the work done at the Mechanic
| Item | Price |
|---|---|
| New Clutch and Front Brake Levers | 180 |
| Front Fork Oil, Fork Rubber Seal | 595 |
| Brake Spring | 300 |
| Engine Oil | 480 |
| Air Filter | 180 |
| Saree Guard Welding | 100 |
| Rear Sidelight | 30 |
| Battery | 1350 |
| Horn and Light | 800 |
| Washing | 150 |
| Other | 310 |
| TOTAL | 4475 |


While the bike was in a rideable condition, it wasn’t without its quirks. It would unexpectedly stall mid-ride, a lingering carburettor issue. (however less frequent now).
Another puzzling problem which I’m still trying to solve, is that the engine revolutions spike when the clutch is pulled in, climbing as high as 8000 RPM without twisting the throttle at all.
If any of you readers have any ideas / information on why this is happening, please reach out to me!
Simultaneously, around this time, I had begun browsing for spare parts online. I found a lot of used and original Hero Impulse parts on Facebook Market, Instagram, and WhatsApp.
Feel free to reach out to me for any of these group links for bike parts!
11th February 2026
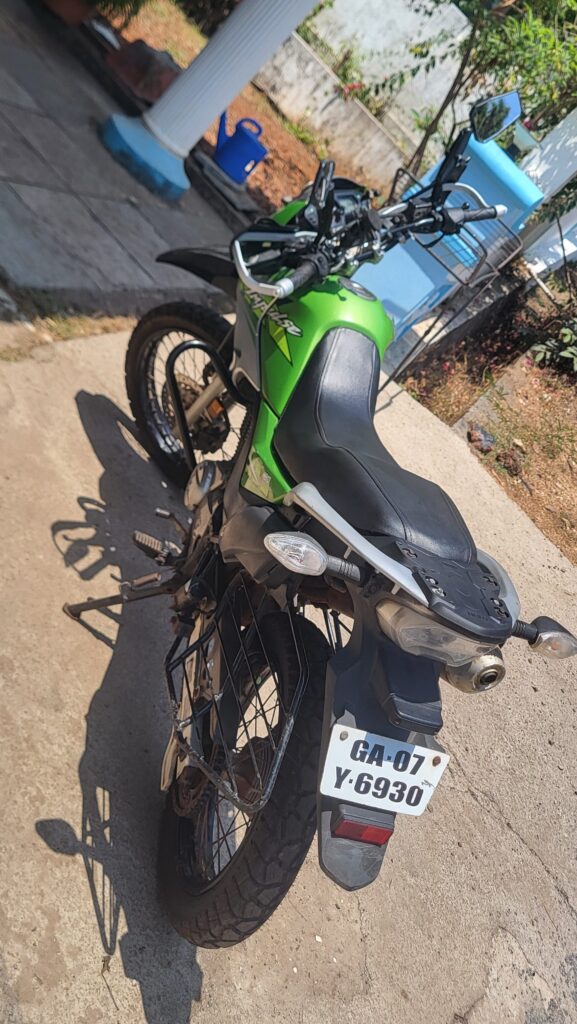
Rear Grip Handle
The first challenge I took upon for Phase 2 was restoring the Rear Grips. Online sources had them listed for Rs. 2000 brand new, so I decided to restore them myself instead.
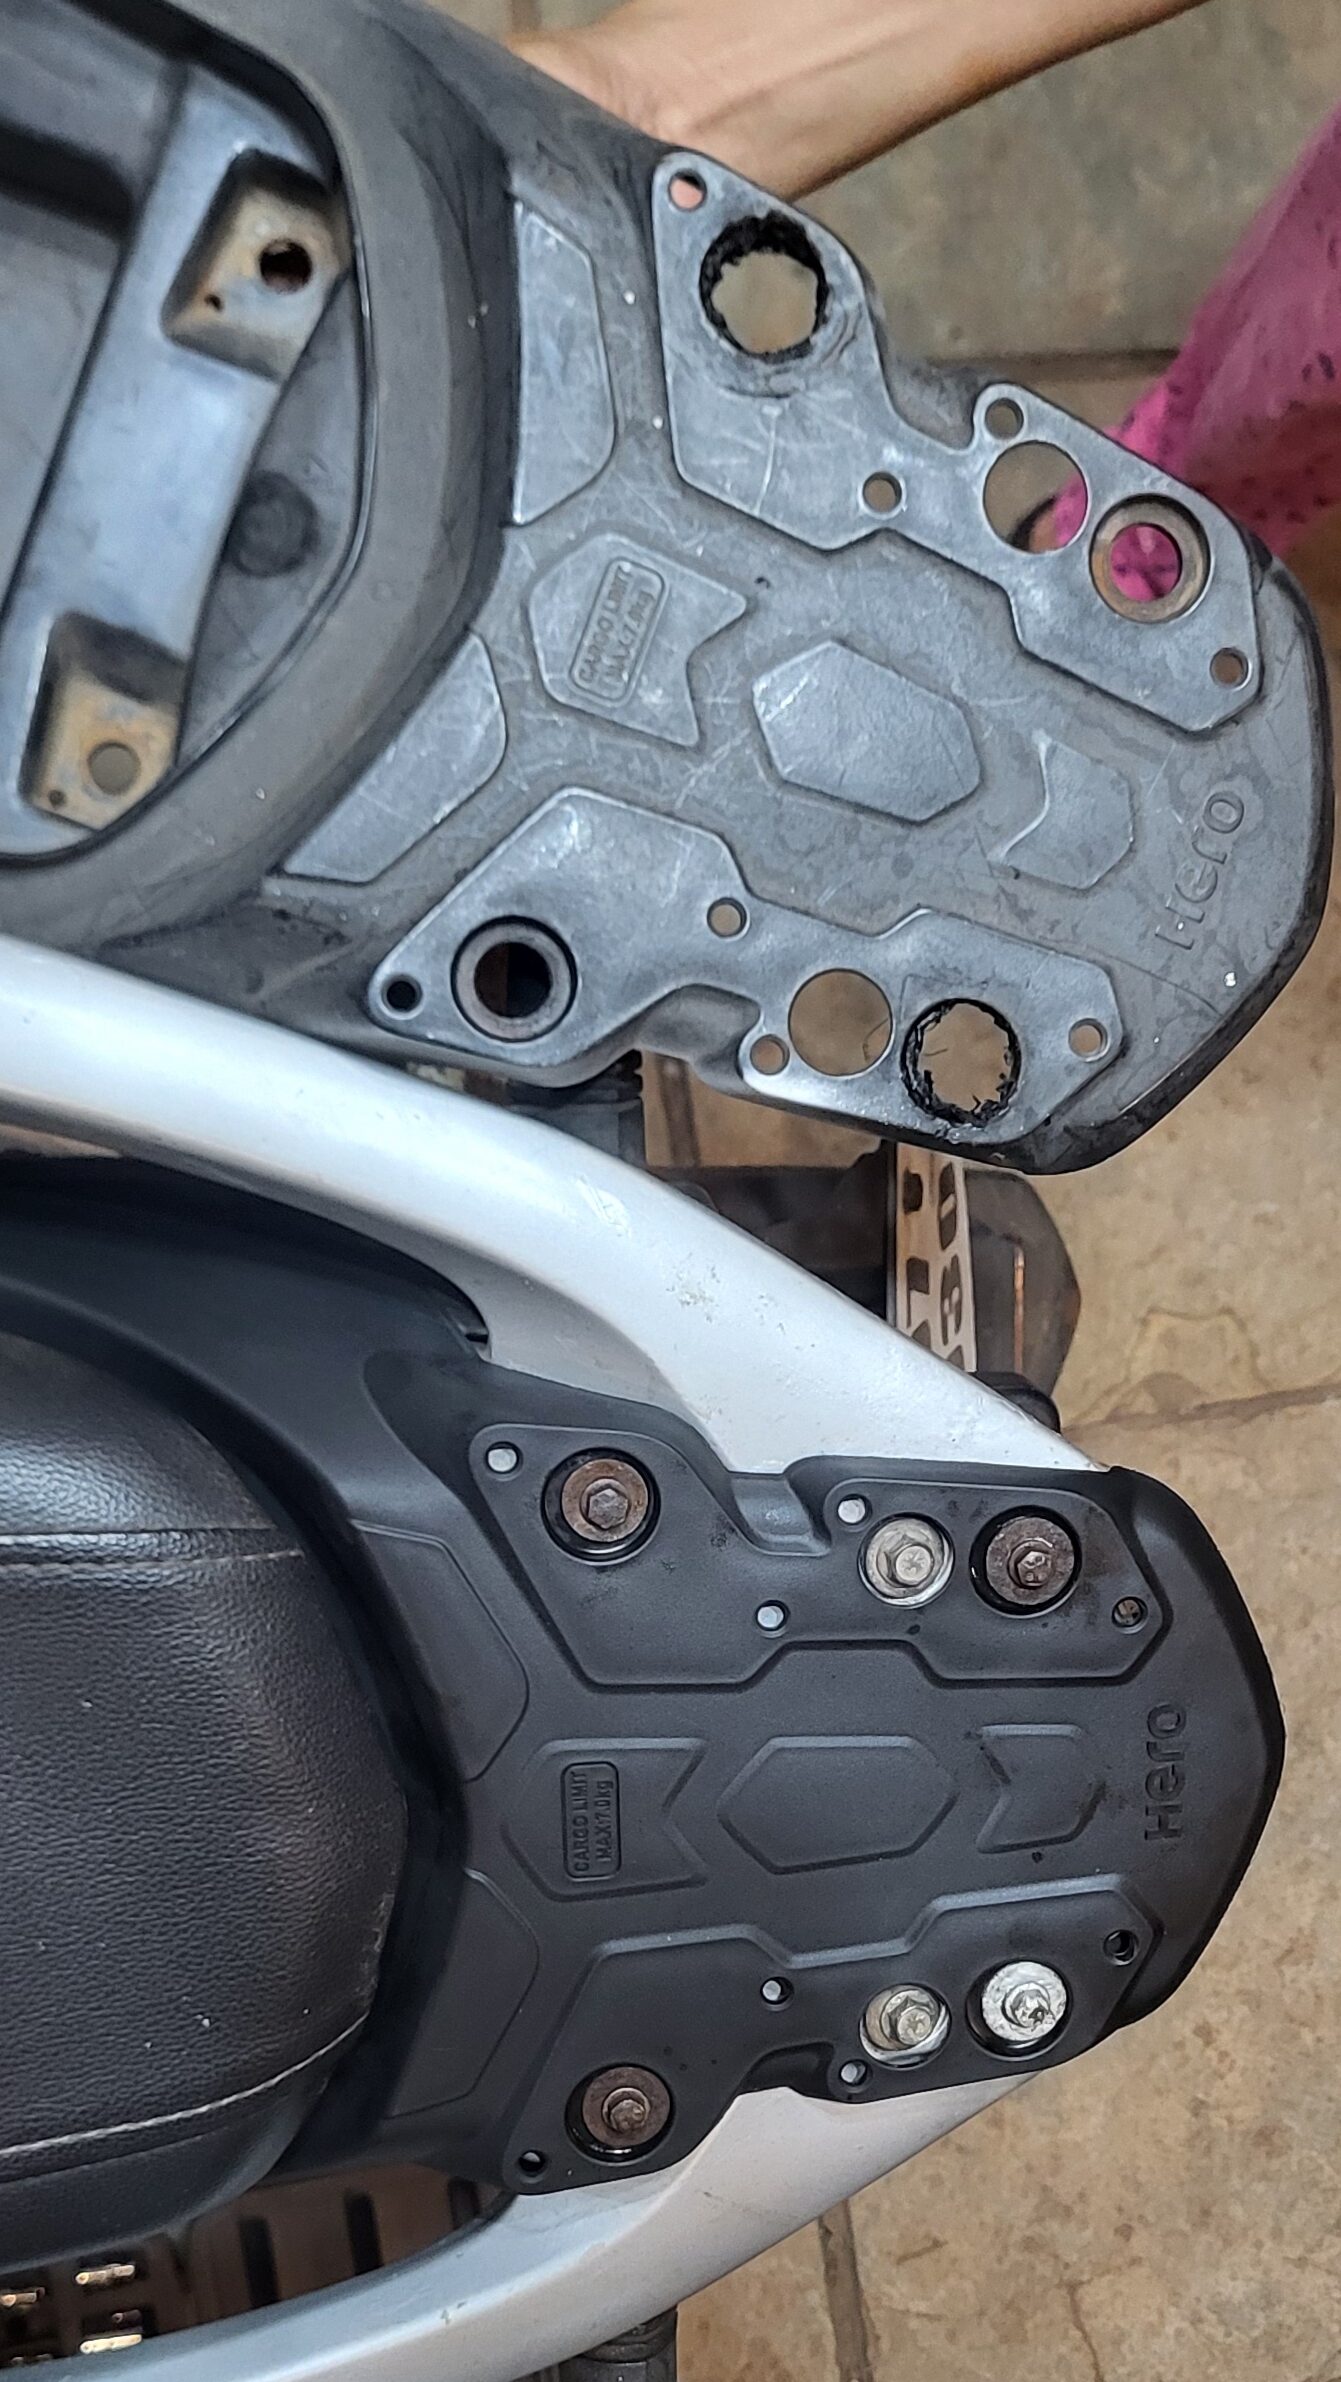
I began by removing the side panels to gain access to the bolts holding the seat. After removing the seat, I removed the rear cowl, leaving only the rear grips and rear indicator assemblies attached to the chassis.
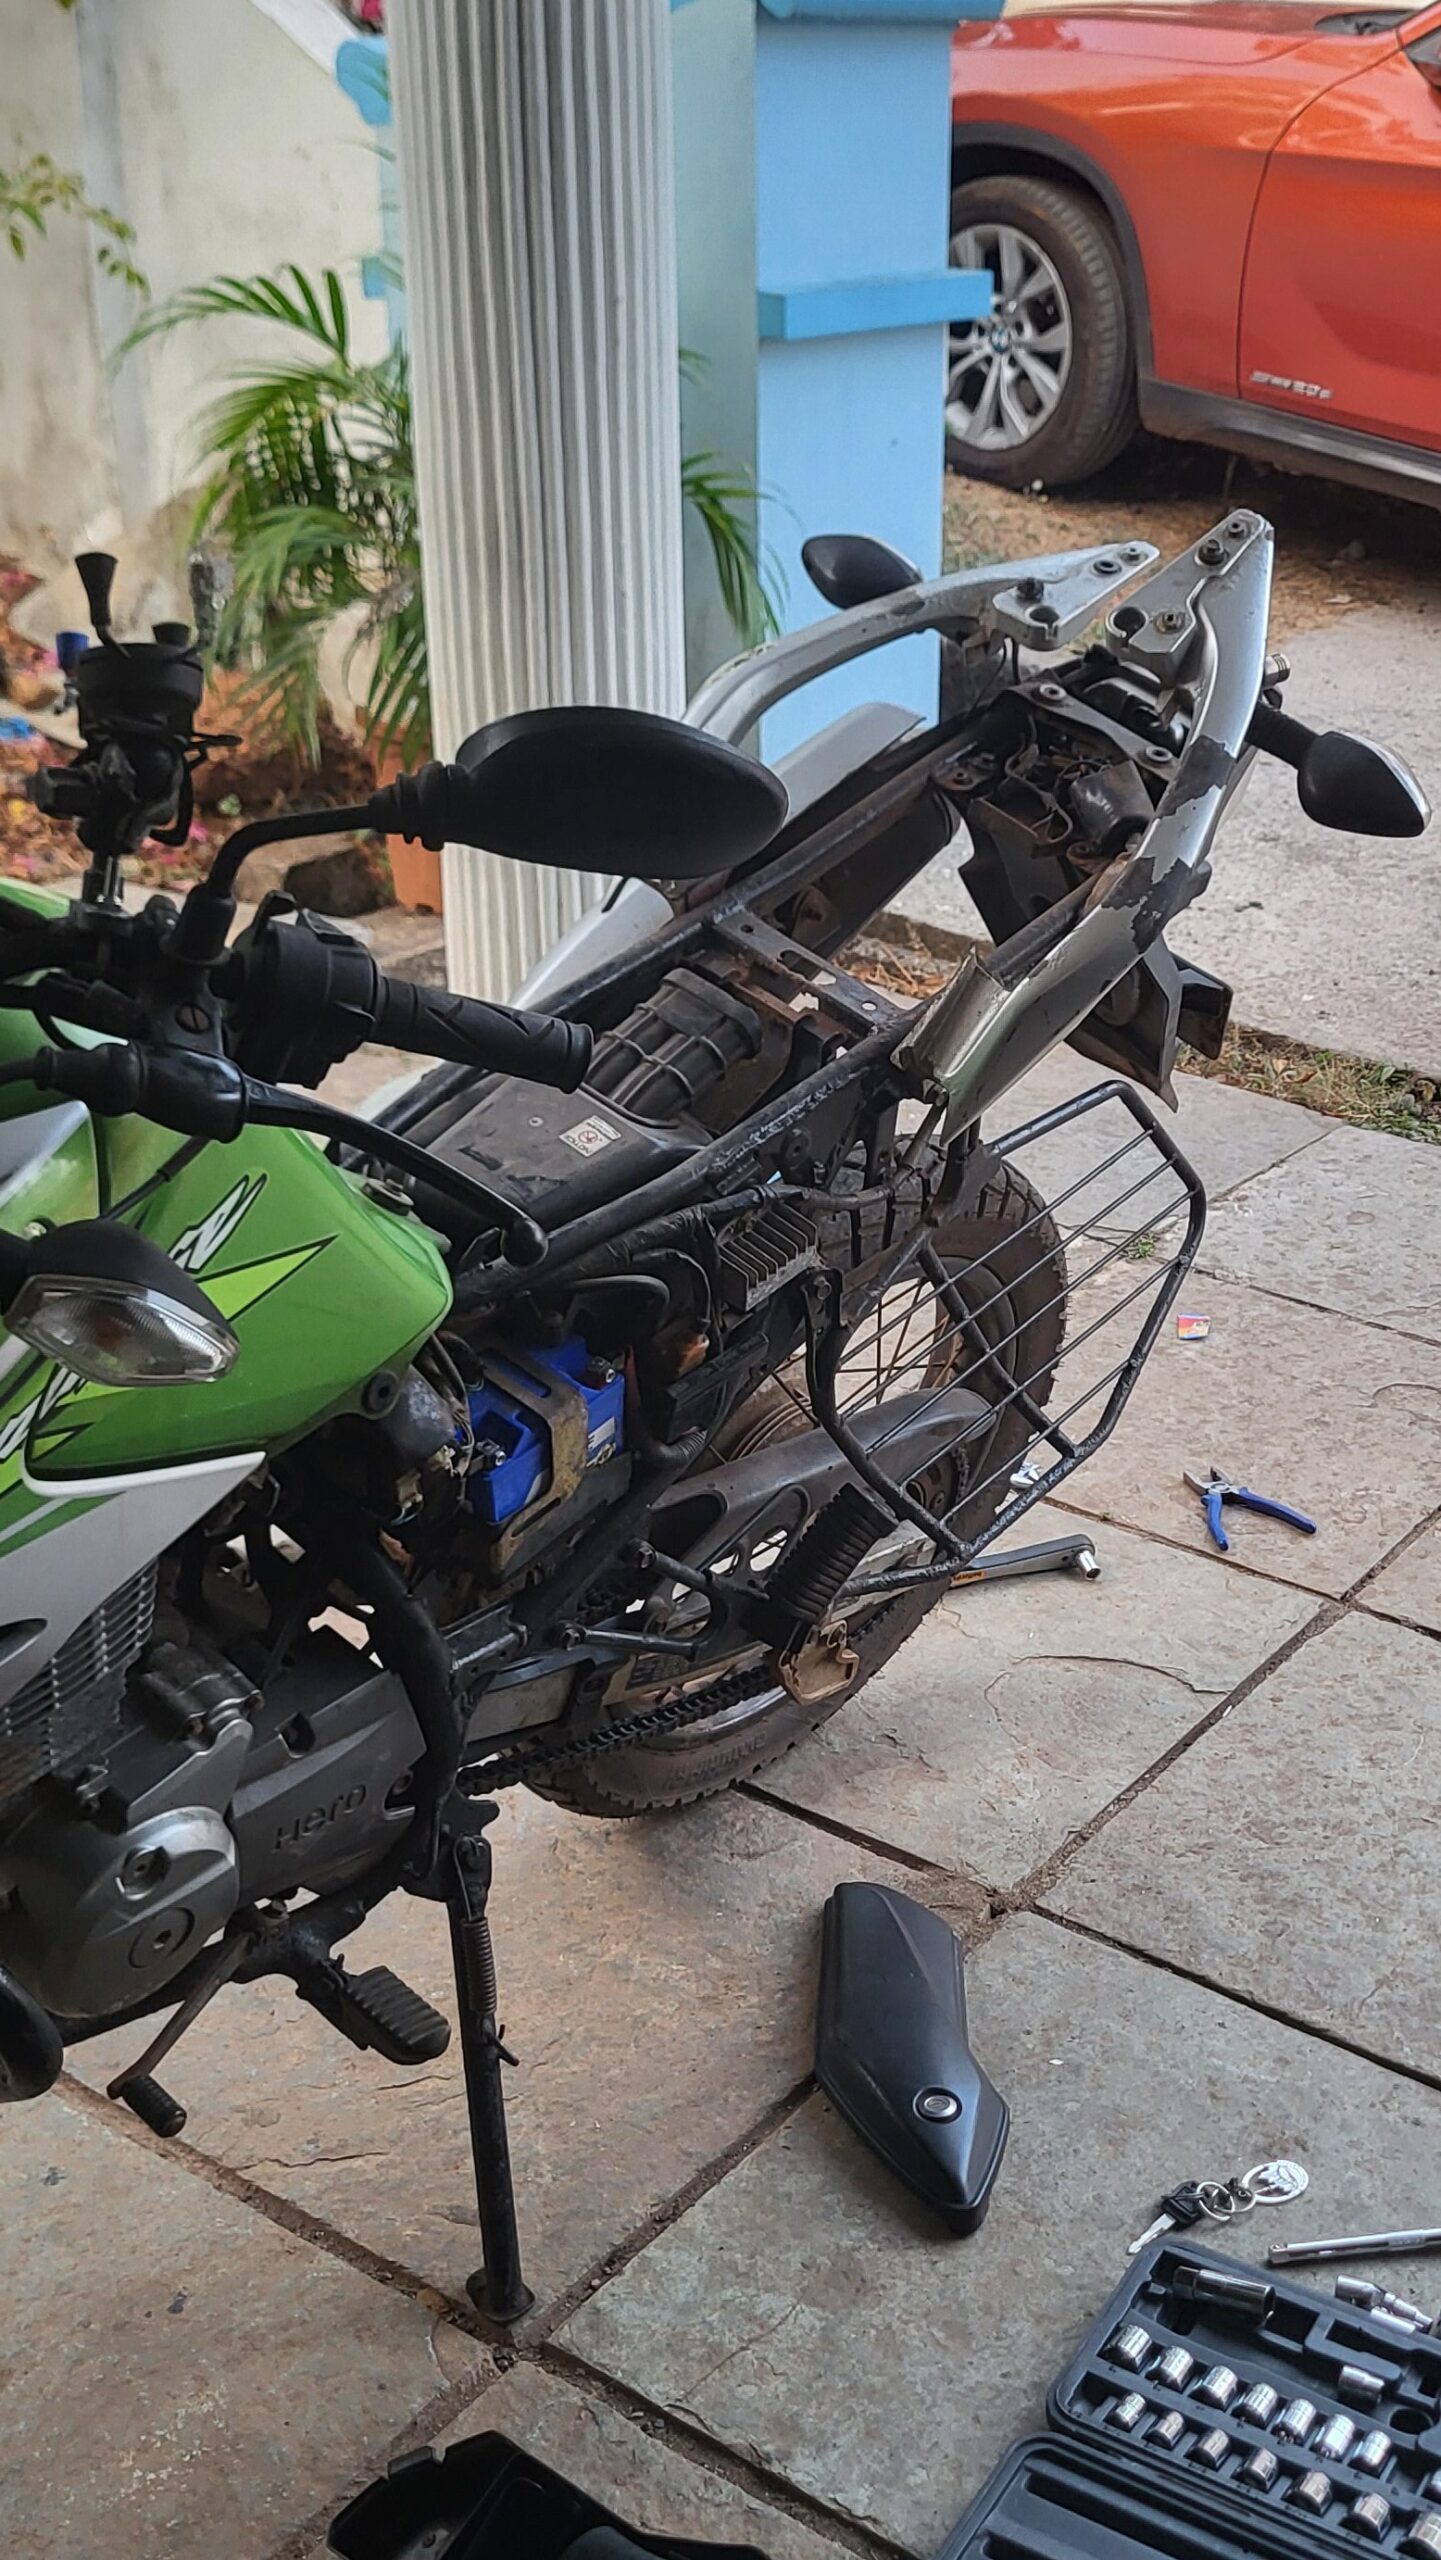

Removing the rear grips was a lot more difficult than I had anticipated. Last year, I had intentionally steered clear of these as I had noticed that they were connected to the brake light and indicator wiring.
However, the real nightmare began when I discovered that the bolt heads had stripped (rounded off). Luckily, these few stripped bolts were only meant to strap on the plastic rear cowl, so after multiple internet hacks (failed attempts), I resorted to tearing the plastic of the rear cowl surrounding it instead.

Detatching the rear grips, involved carefully removing the rear indicator lights. It was a three-way screw set up, each fastened on a “stay” hanger. Before I could even touch the indicators, I had to remove the extra fog lights that my Dad had installed years ago. Unfortunately, I had to just tear these off, as it was impossible to disconnect the wiring. It was a tedious and technical job, but I finally gained access to the primary bolt holding the grip in place. After hours of toil, the rear grips were finally free. However the sun had set and my energy was spent. I delegated the task of sanding the grips to my mother and brother for the next day.
12th February 2026
Rear Grip Handle Painting

The next day, when I returned home from university, my mother and brother had hit a bottleneck. They lacked the rough-grit sandpaper needed to smoothen the grips.
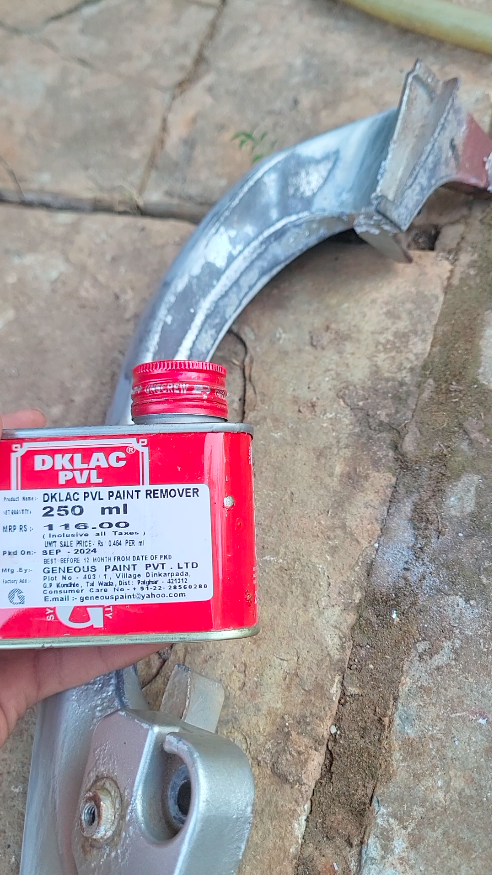
I had initially avoided using a harsh chemical paint remover, however eventually I conceded defeat. After a final pass with the sandpaper, it was ready to be painted.
I hung the grips on my mums clothes line using binding wire. I applied 2 coats of silver aerosol spray paint and left it to dry. Within an hour, I thought the paint had dried. Eager to use the bike again, I rushed into reassembling the grips. I quickly learned a crucial lesson to leave the paint to dry overnight next time, because as soon as I started to roughly hold and screw the grips in, the fresh finish became dirty, smudged and scratched.
By late evening, the tedious task of reassembling the rear grips turned into a real test of my patience. Another nut head rounded off and wedged itself in the rear grip, stubbornly refusing to be pried out. Losing my patience entirely, I grabbed a soldering iron and roughly melted a path through the rear cowl plastic, forcefully shoving the entire plastic into place.


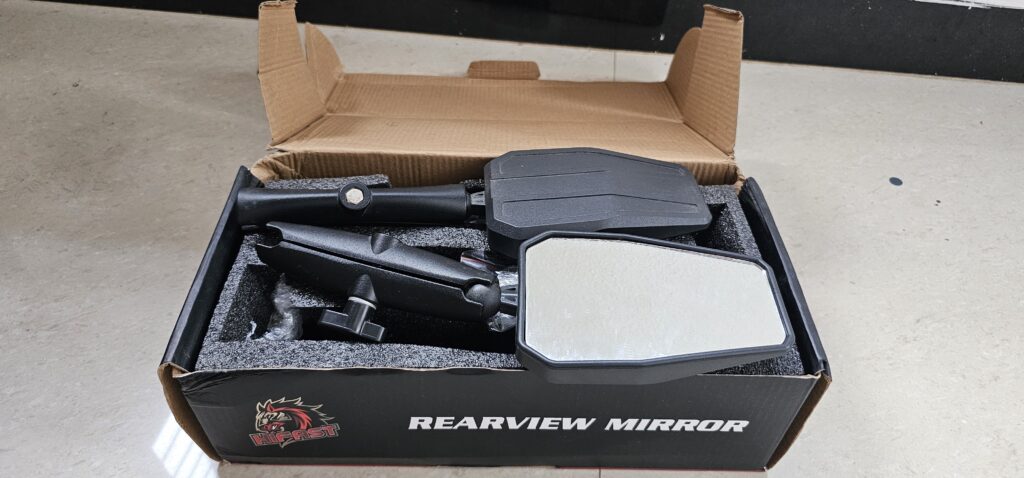
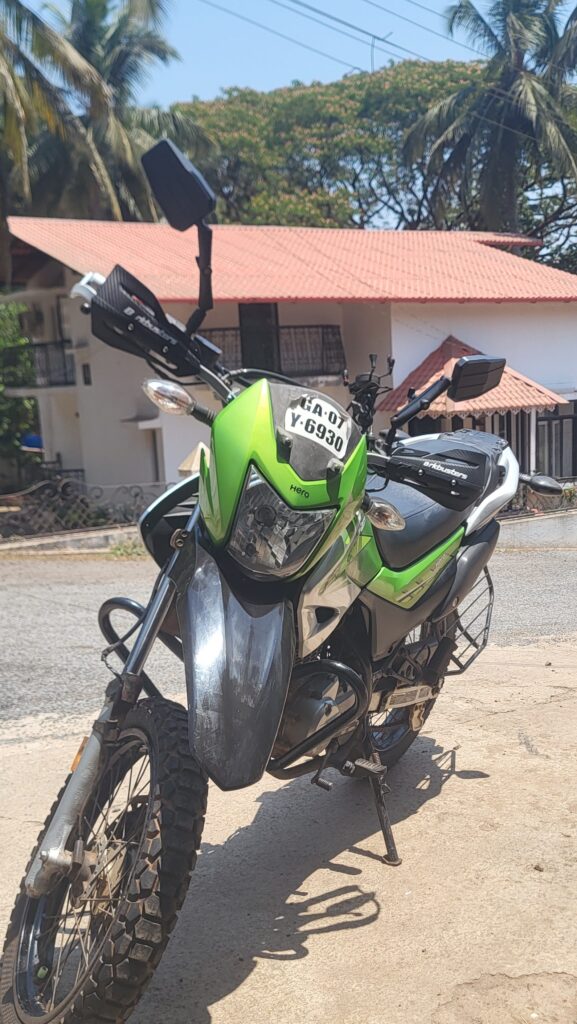
Later on that night, I stumbled across brand new Adventure Rear View Mirrors on OLX. They were in pristine condition, and I successfully bargained the price down from Rs. 1000 to Rs. 800. These mirrors are perfect for off-road adventures, and can be easily adjusted using a ball-socket joint mechanism. The cherry on the cake, was that I saved on delivery charges, as my cousin staying in Pune, carried them to Goa for me.
26th February 2026
Adventure Mirrors
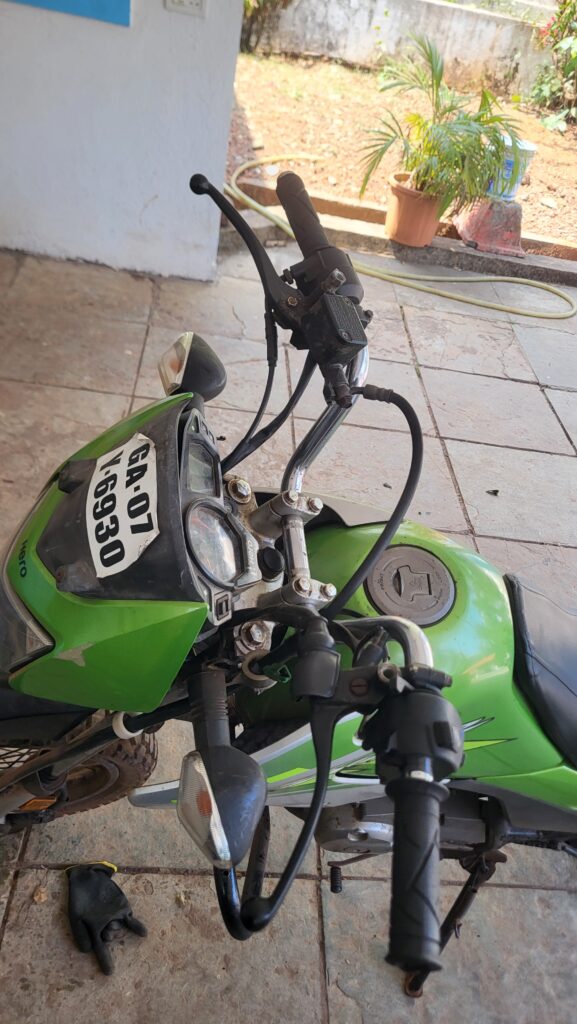
I installed the adventure mirrors on 26th February, 2026. Initially, I thought it had been a waste of money as they rattled and fell off from their position easily. The ball-socket joint was not tight and gave way gradually with the force of the wind. The solution? A quick google search led me to an easy hack (“jugaad”) to fix this problem. I applied a coat of clear nail polish over the ball; It added just enough friction to tighten the fit and stabilise the mirrors. The mirrors enhanced the bike’s overall aesthetic.
28th February, 2026
Knuckle Guards
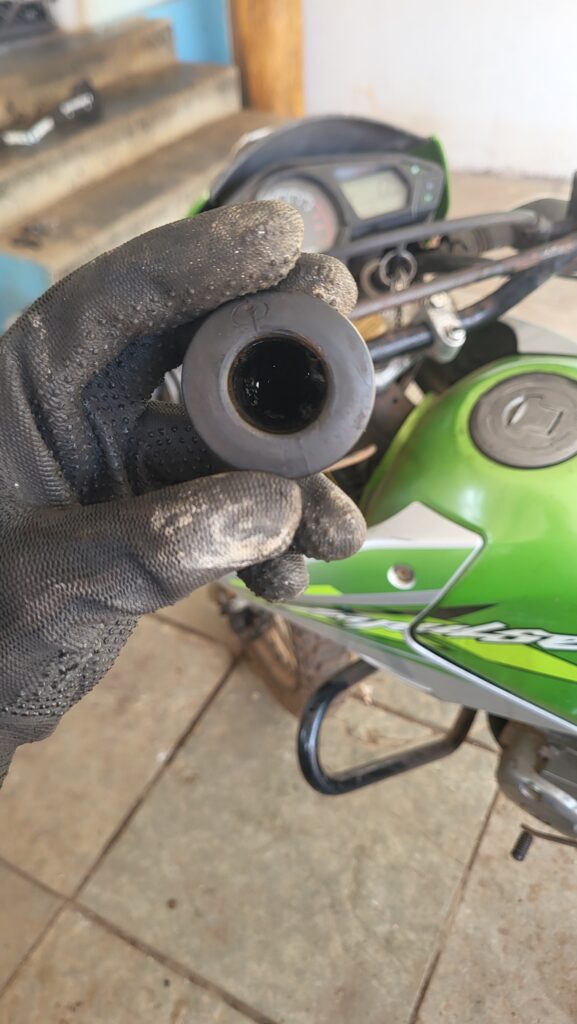
The following day, I headed to “Bikers Choice” in Panjim to install knuckle guards. I chose the black, aluminium Barkbuster Handle Guards. Including the handlebar weight plugs, I bargained the price down to Rs. 1000. I hope that it will prove to be a solid investment in the long run.

I was scouring the internet for parts and I came across gold! I found a rear cowl, fork reflector and master cylinder cap among an array of other parts that I needed on a WhatsApp Group. I began with a small order of these 3 parts, as trusting an online contact to deliver parts worth Rs 1000 felt scary.
6th March, 2026
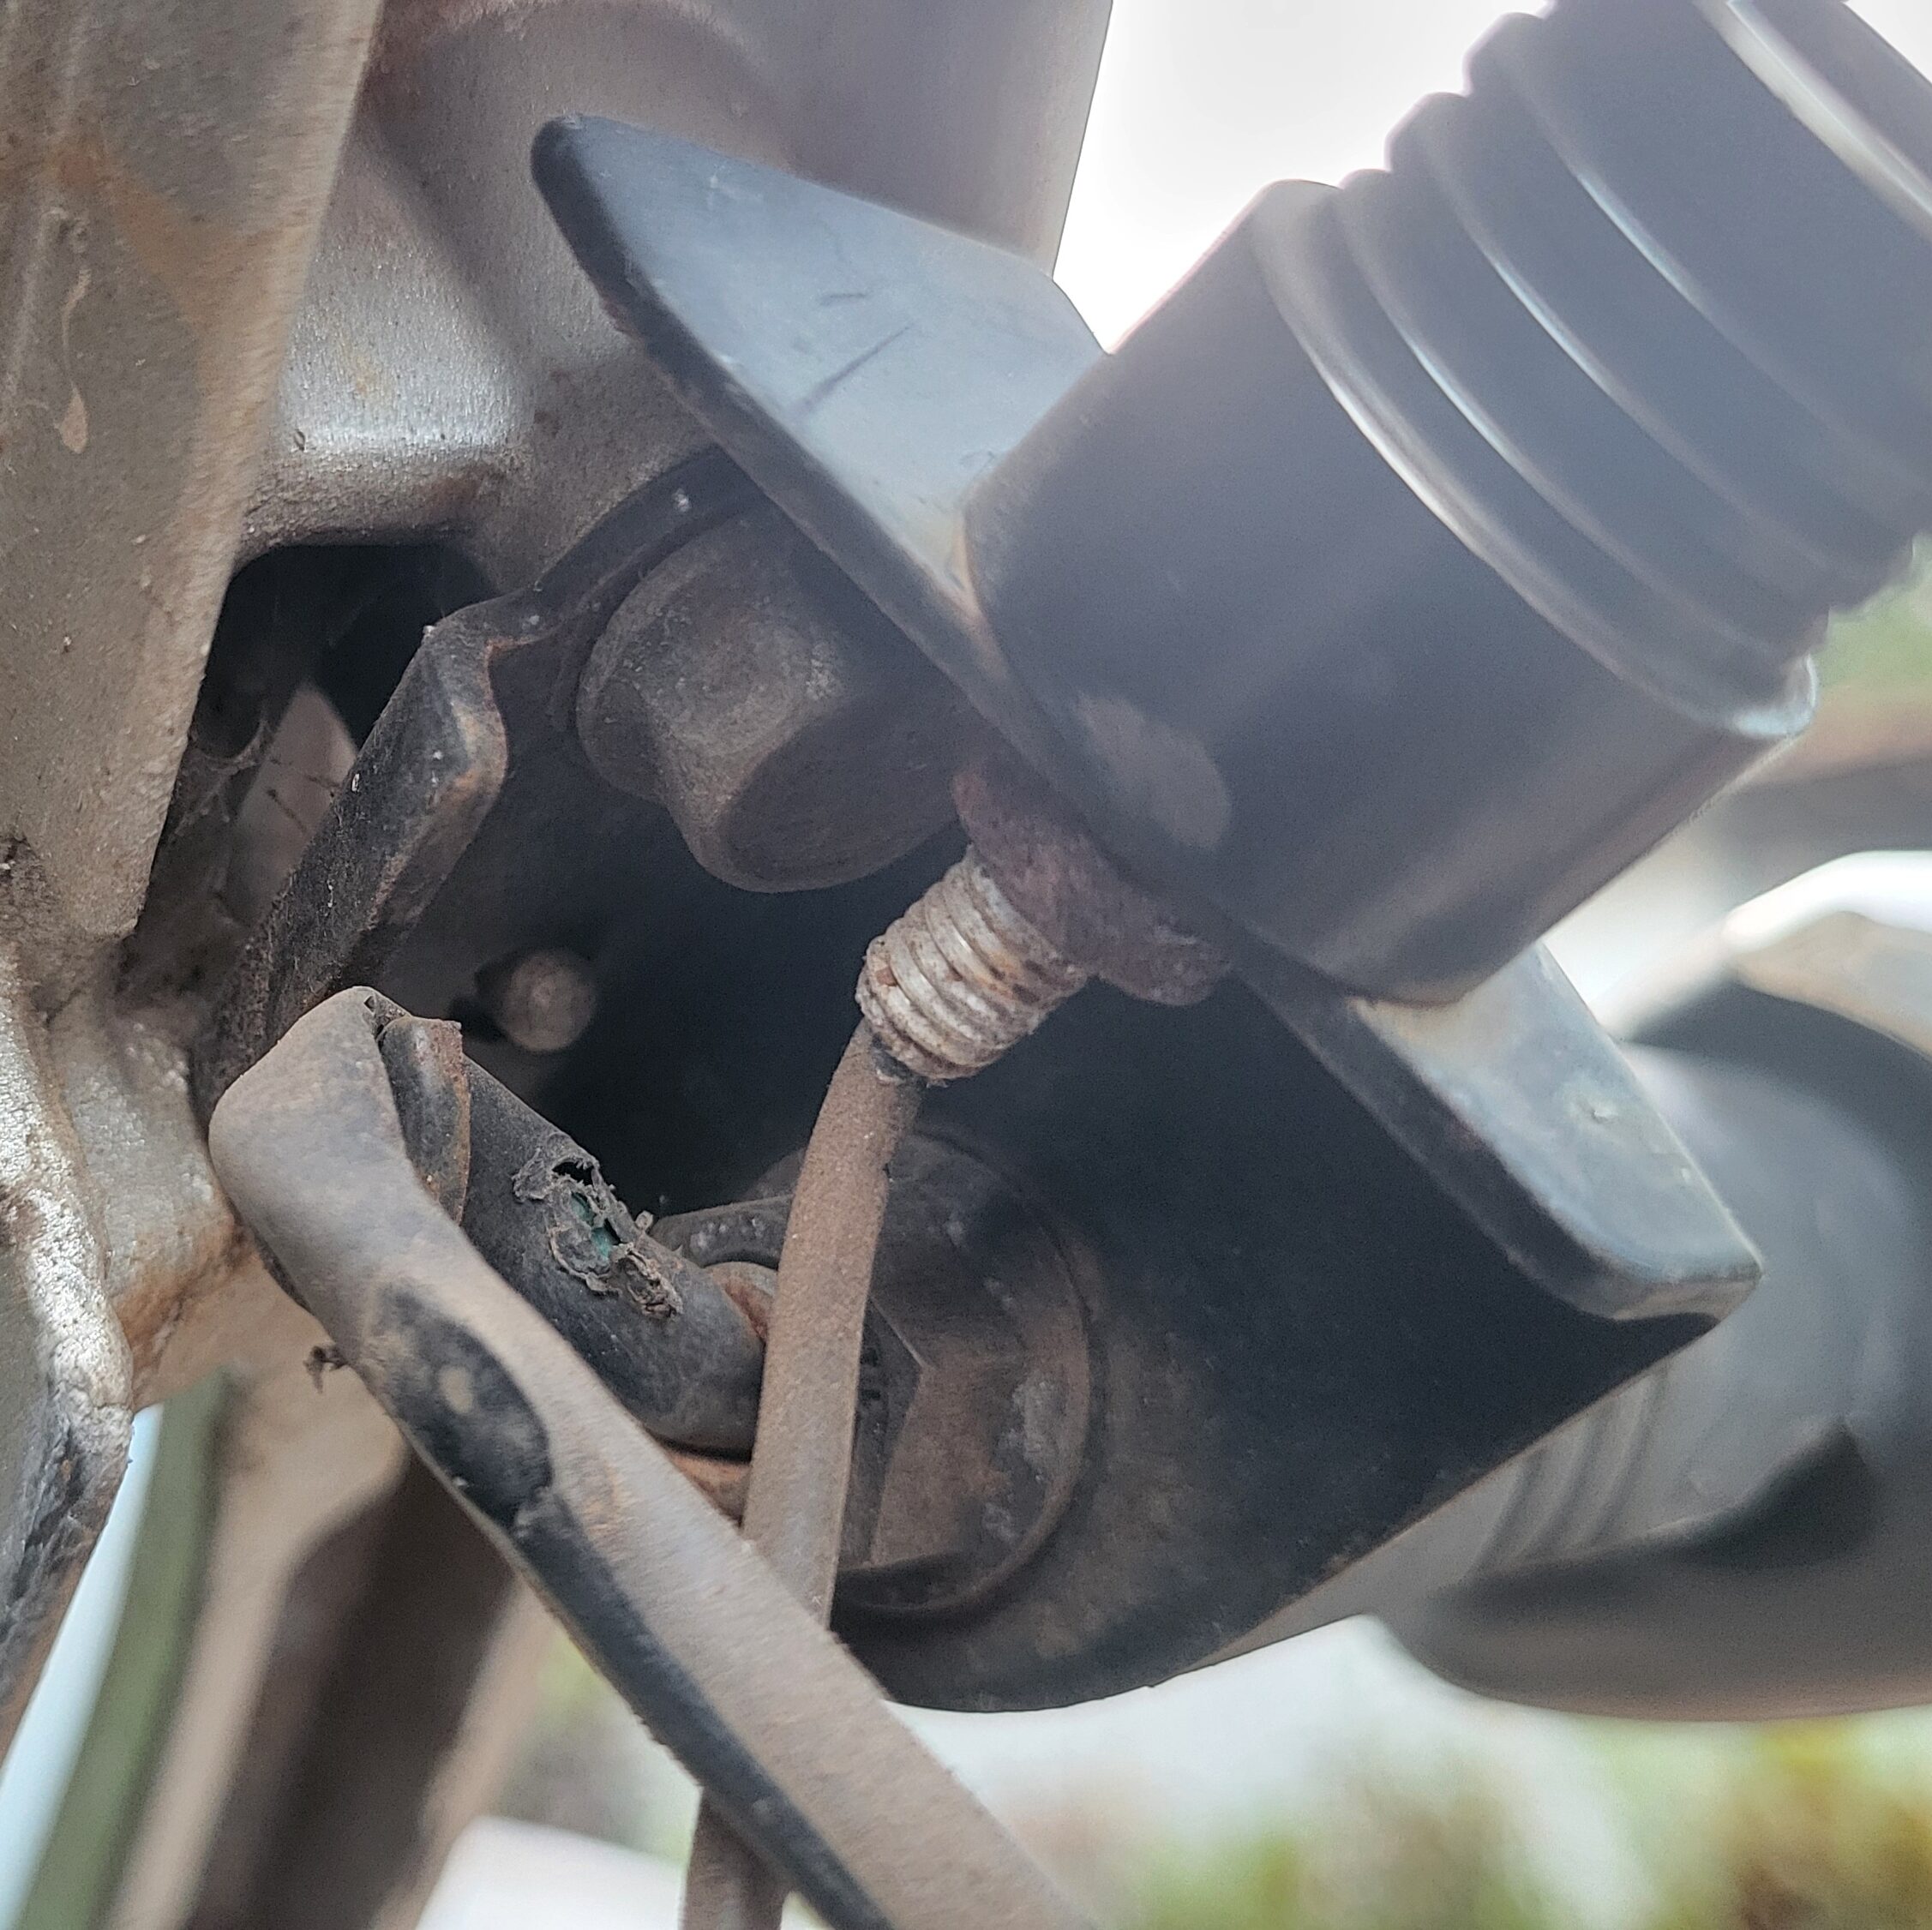
Exhaust Heat Shield

This unexpected roadside emergency on 6th March occurred when the exhaust protector pipe gave away and flew off while I was riding down the Ribandar Causeway. I took it to a welder later on that day, and fused it back onto the bike with a fresh weld.
12th March, 2026
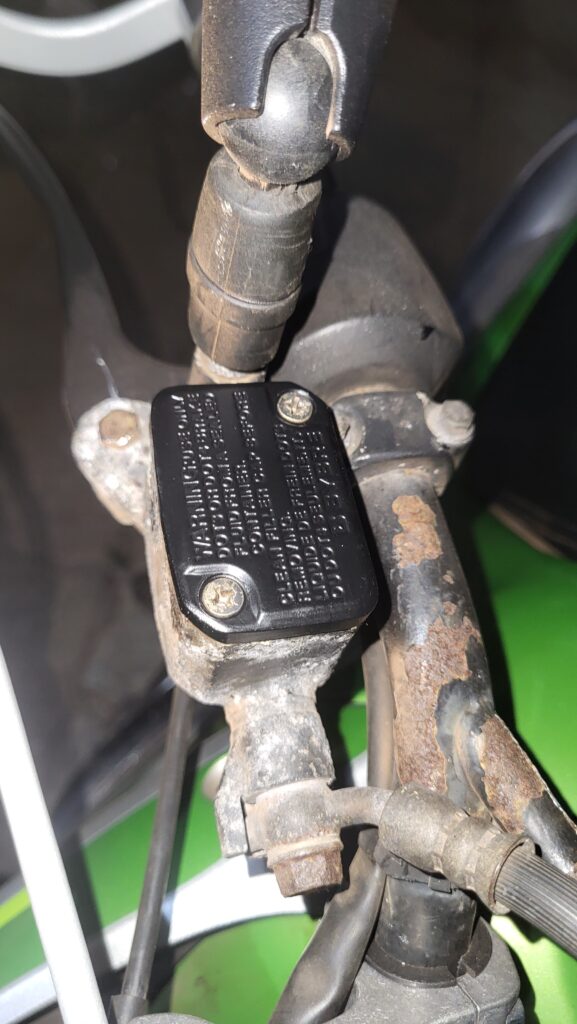
Master Cylinder Cap
On 12th March, the parts I had ordered from Raipur, Chhattisgarh, finally arrived, and I dove into installing the Master Cylinder cap. It was a perfect fit and instantly upgraded the look of the worn handlebar.
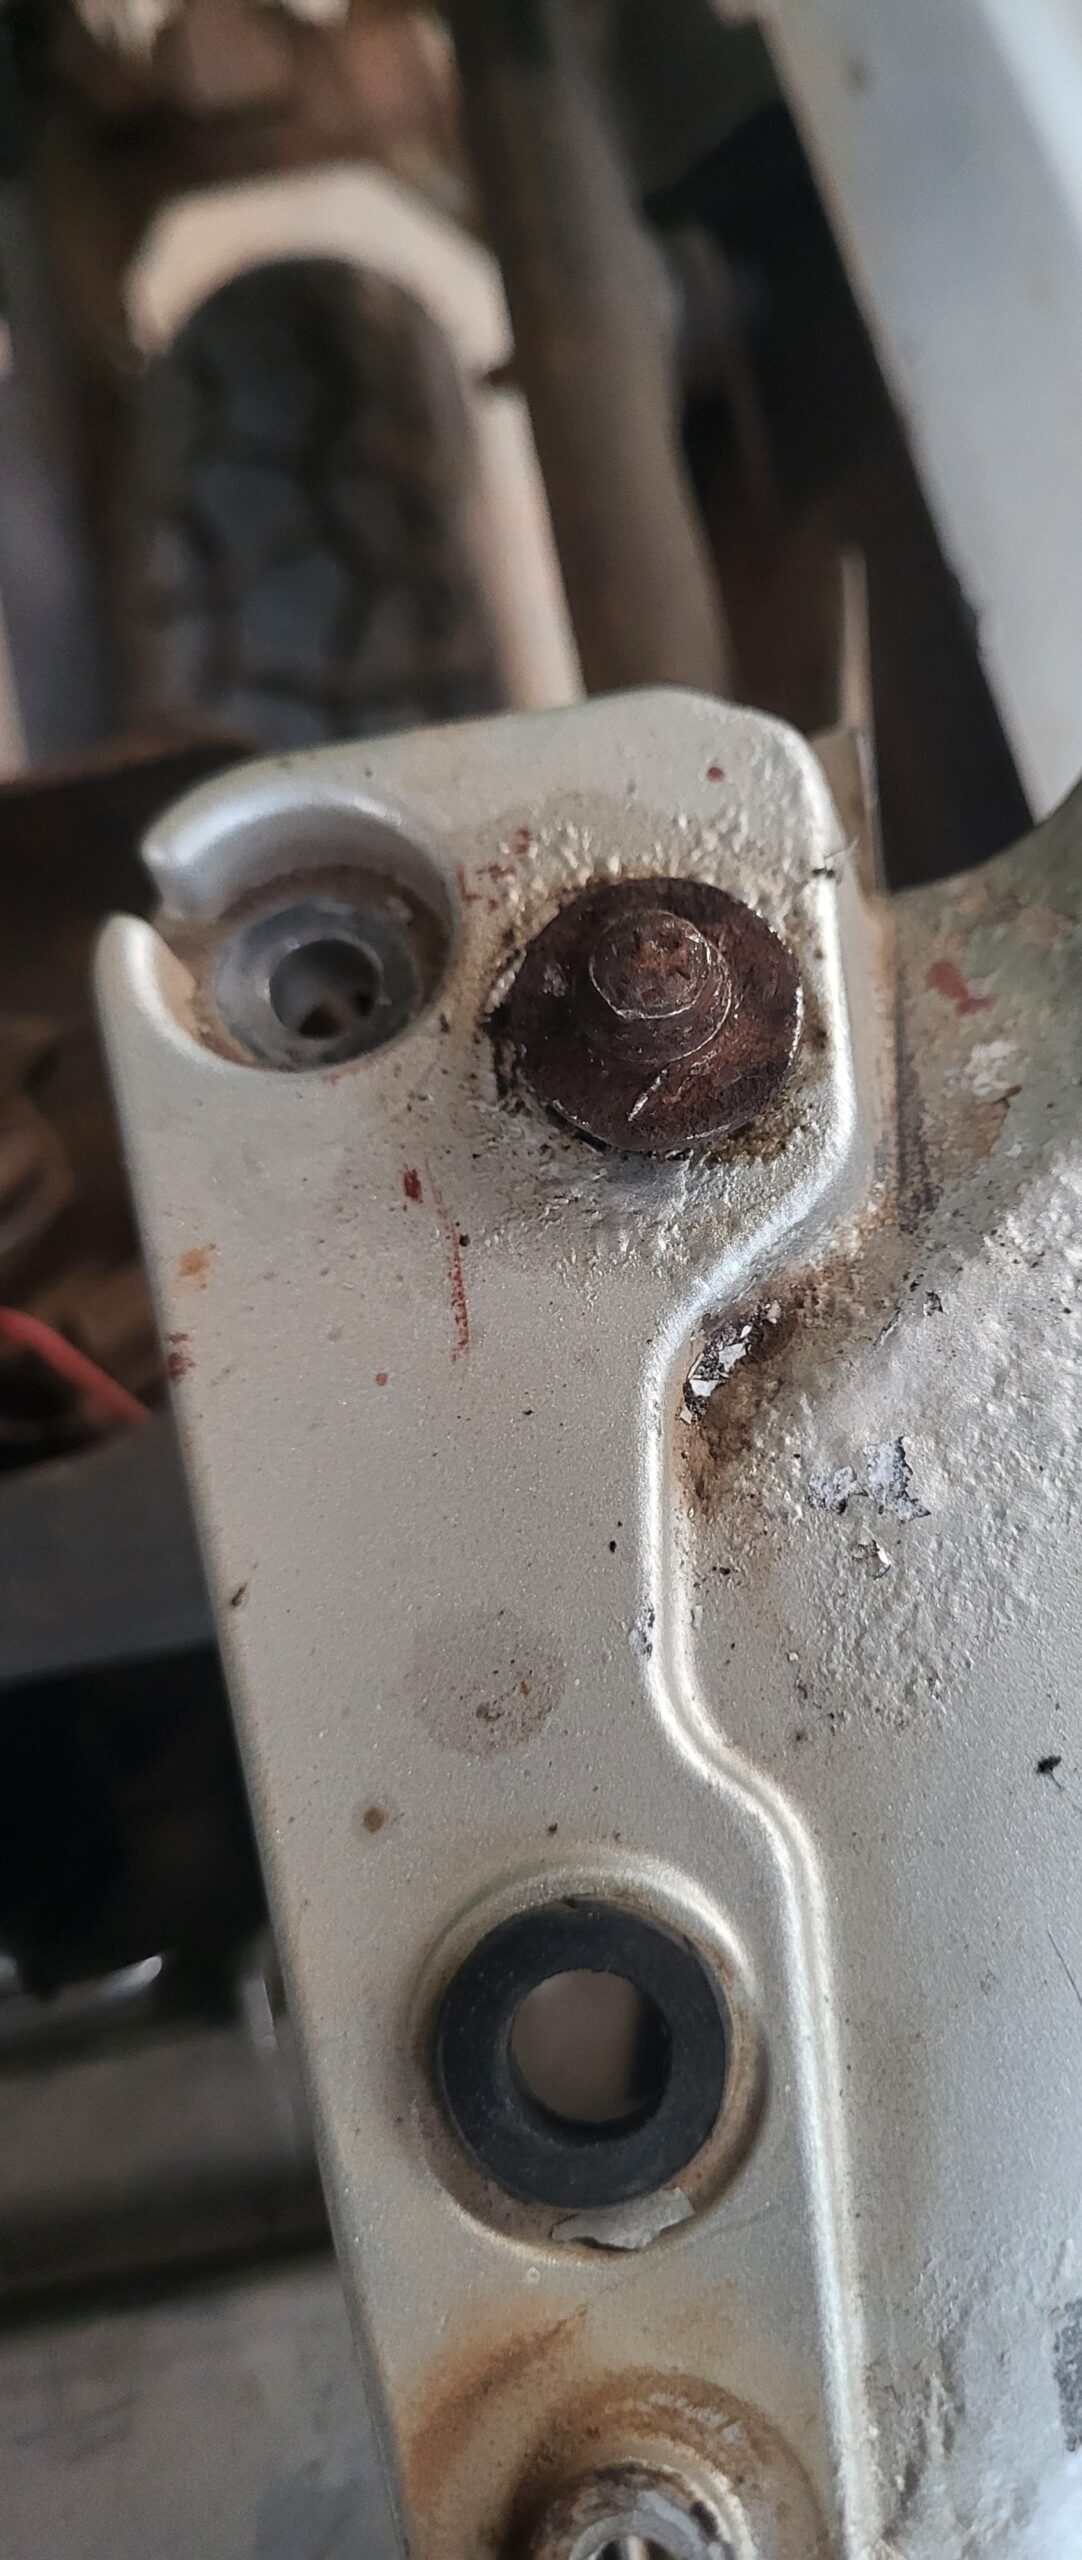
I now needed to seek professional help to remove the earlier stripped bolts of the rear cowl, so I could install the new one. In addition, I hit a snag when the mounting screw of the new fork reflector was a mismatch for the stock holes, requiring a bit of custom threading to get them mounted on correctly.


14th March, 2026
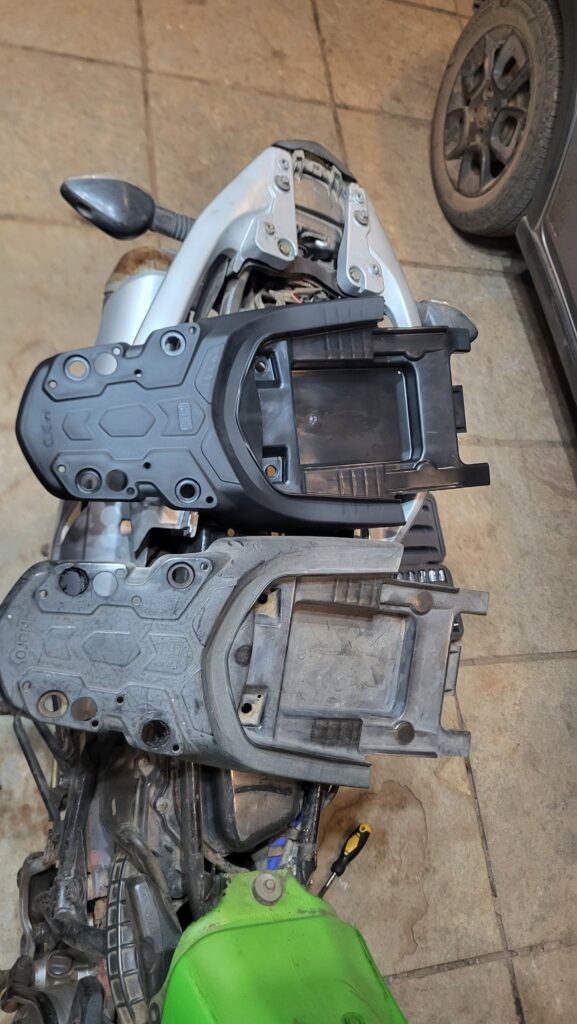
Rear Cowl, Fork Reflector
On 14th March, I finally got around to installing the new parts. The stripped screws had been skilfully removed and the fork reflector hole widened.


I repeated the teardown process, removing the seat to access the mounting points for the rear section. Once the new cowl was in place, I avoided any over-tightening to prevent another round of stripped heads.

The final touch was the fork reflector; it was a small detail, but it successfully restored the symmetry of the front wheel fork assembly.


19th March, 2026
Handlebar Restoration
After a week of daily rides, I decided to use a rare holiday from university to finish all the work on the handlebar.

In a stroke of bad luck, my sister’s Hero Splendor had snapped its chain the day before, leaving no backup transport at home. Therefore, this wasn’t the ideal time to take up such a big task on the Impulse. I knew the handlebar would need at least 24 hours to dry, in addition to the time taken to assemble / disassemble all the parts, sand it down, and paint it. To make matters worse, I was really enjoying being able to ride the bike every day and I couldn’t stand the idea of being off the road for 2 days.

So, I contacted the same friend that lent me the paddock stand, and managed to borrow a spare handlebar from an old adventure buggy. With zero experience in handlebar disassembly, I started the removal process.
The first hurdle after removing the guards and mirrors were the rubber handle grips, which refused to come off due to years of rust and grime. I tried every single online solution in the book, wedging all sorts of tools between the torn rubber and flooding it with WD-40. After half an hour of wrestling with the bike, they finally slid off.
I started on the left (i.e the clutch lever, mirrors, phone holder). I easily removed the mirror holders, phone stand, and clutch lever. To avoid losing bolts, I simply removed one side of each bolt that gripped around the handlebar, and left it partially threaded on, suspended in the air.
When I reached the light switch assembly, I had completely overlooked the existence of the choke. Suddenly, removing the left assembly became a lot more difficult as I had to disconnect the choke cable from the choke lever. I was discovering these assemblies and mechanisms along the way.

My premonition was spot on: the right side was where the real battle began. The mirror, brake master cylinder, and brake lever unbolted smoothly enough, followed by a familiar, exhausting wrestling match with the right handle grip. Up until this point, I had surprisingly avoided any more stripped bolts. That streak of luck ended when I came to the throttle assembly…I confidently unscrewed one side, not all the way, just enough to split the housing and slide it off. A dreaded stripped screw head was waiting for me on the under-side. The right switch assembly would not come off entirely, so I had to unscrew the handlebar from the risers on the triple tree and slide the bar out, instead of sliding the assembly off the bar.
Installing the buggy handlebar back taught me that handlebar assemblies used a handlebar locator pin and hole assembly apart from being clamped on. (I had no idea before this!) The holes in the buggy handlebar were a complete mismatch. They were out of position; one was drilled on the top surface and the other on the bottom, reversing the layout of my stock setup. Luckily, there was a pre-existing welded provision for an alternate hole, but using it meant I had to mount the entire handlebar backward. Hence, I bolted it the opposite way, a decision my wrists would regret the next day.


After a half an hour break, I decided to start sanding down the handlebar.
I sanded it initially for 30 minutes, after which I applied the paint remover solution and left it to work its magic. After an hour, I continued sanding down the remaining paint.
Once it was completely smooth, I began the painting process. I hung the handlebar on my mums clothes line and applied several coats of matte black. The colour was perfect and I was please with the paint job this time. In fact, I liked the colour so much, I impulsively pulled out worn side panels and exhaust shield to paint as well.

While the plastics were dry by evening, I stayed disciplined with the handlebar, letting it fully cure for nearly 48 hours to ensure a rock-solid finish.
After a 3 day break, it was finally time to re-install the freshly painted stock handlebar. This time, I was more prepared for all the minute adjustments and attachments that needed to be made. The real test of patience came when mounting the Barkbuster handguards as the handlebar real-estate was super crowded despite being relatively wide. The entire process took from 9:00 am until noon.
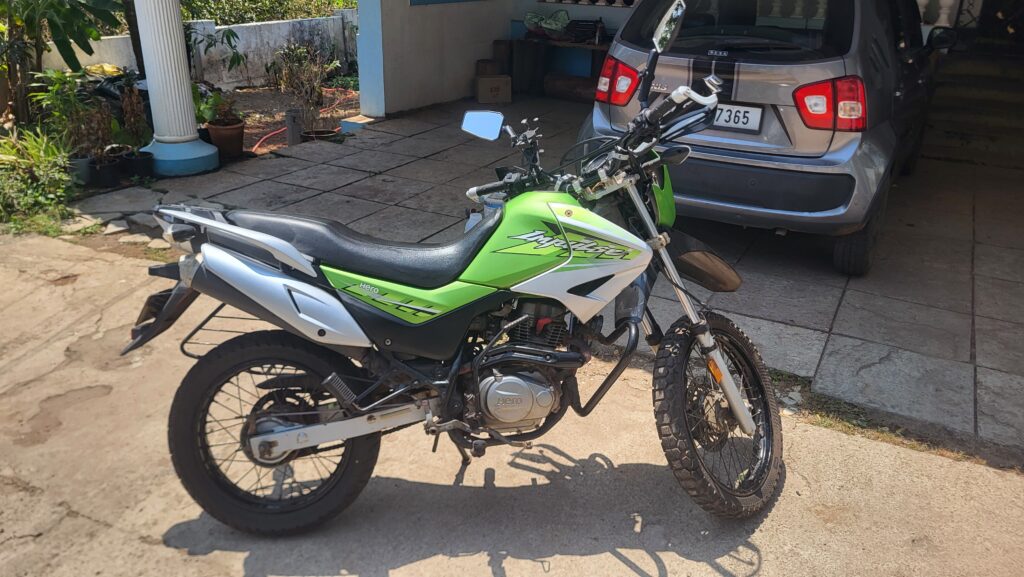
I spent an extra half an hour, to wash and polish the bike, and just like that Phase 2 drew to a close.
The bike looks incredible. The contrast of the fresh matte black against the classic dirt-bike green gives it a sharp, aggressive stance. The only remaining eyesore is the weathered front headlight visor with its peeling plate sticker, which I aim to replace in Phase 3.
Until then, ride safe, and stay tuned!

Total Project Cost Breakdown (Phase 2)
| Item / Service | Cost (Rs.) |
|---|---|
| Initial Mechanic Work (Detailed earlier) | 4475 |
| Silver Spray Paint 400ml | 180 |
| DKLA Paint Remover | 100 |
| Sand Paper | 50 |
| Master Cyl Cap | 100 |
| Fork Reflector | 70 |
| Rear Cowl | 680 |
| Shipping | 170 |
| Welding + Mechanic Work | 400 |
| Adventure Rear View Mirror | 800 |
| Barkbuster Aluminimum Hand / Knuckle Guards | 1000 |
| Black Matte Spray Paint 400ml | 200 |
| Mr DIY Gloves | 60 |
| TOTAL | 8285 |